


Converting Query Builder Files for Use in Dynamic Reporting


Article Highlights:
- Convert your Query Builder Reports to Dynamic Reporting with this process.
- Share your reports so that other users can run or view them.
Reynolds has created a new reporting solution called Dynamic Reporting. It is a more robust and secure tool for creating and exporting reports. Because of the new system, Query Builder will no longer be available with the 24.50 release, scheduled for May 2015, so getting your key reports converted is critical.
As you begin the transition from Query Builder to Dynamic Reporting, you probably have a few favorite reports you would like to re-create. Rather than rebuilding these reports from scratch, let’s walk through how to import reports into Dynamic Reporting.
Since Query Builder files are stored on the PC where they were created, you will need to import the .wis file from that PC. Once the report is created in Dynamic Reporting, it will be available from any PC.
Let’s look at how to import a Query Builder report in Dynamic Reporting:
1. Go to Dynamic Reporting by opening the Retail Management Intelligence application, then select Dynamic Reporting from the User-Defined Reports section on the left side of the screen.
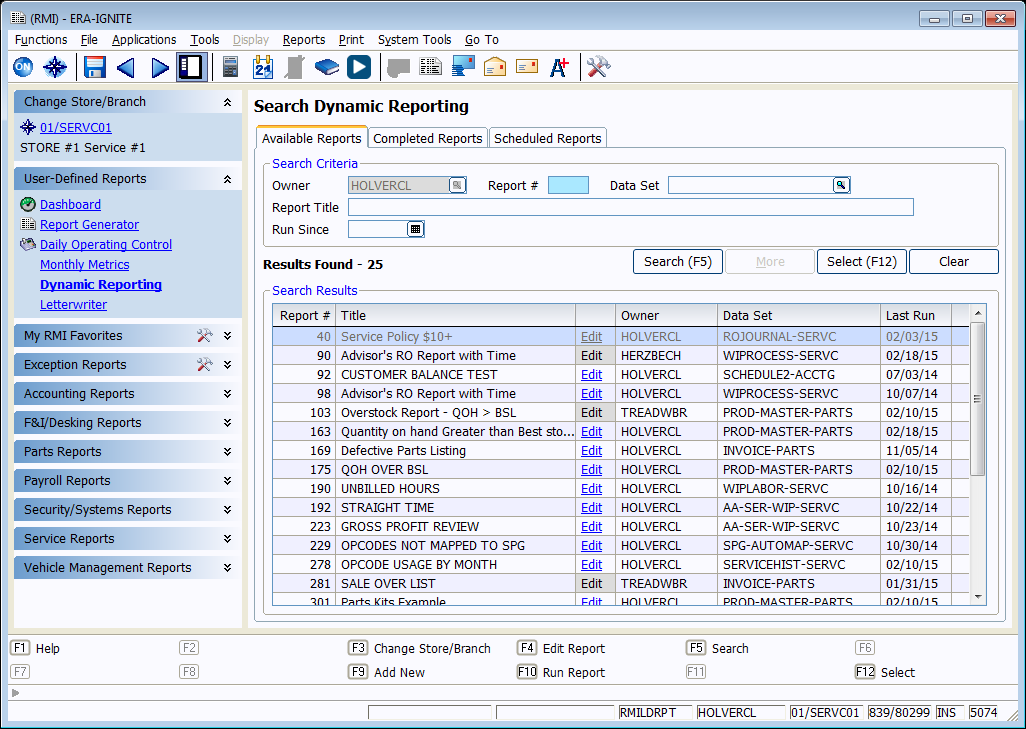
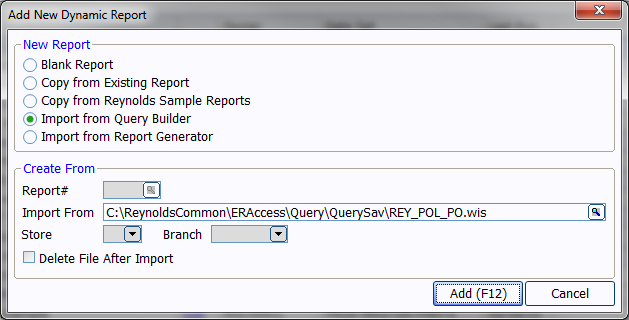
2. Press Ctrl+A to open the Add New Dynamic Report window, or press Add New (F9).
3. Select Import from Query Builder, then press F2 in the Import From field to browse your PC for the desired .wis file.
4. Press Add (F12) to import the Query Builder .wis file into Dynamic Reporting.
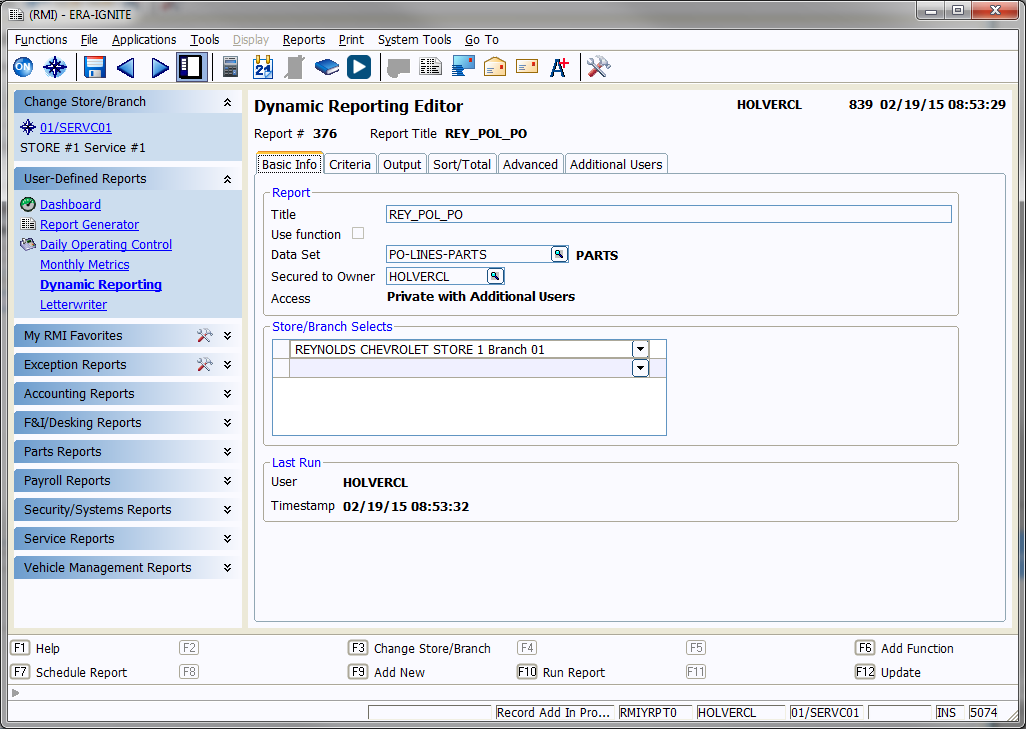
5. Once imported, the Basic Info tab in Dynamic Reporting displays. Here you can rename your report, secure the report to a different owner, and select the Store/Branch(s) for which you wish to pull data for your report. In Dynamic Reporting, you can pull data from up to 20 different Stores/Branches.
6. You should review the Criteria tab, but it shouldn’t need to be changed. The criteria pulls from Query Builder.
7. If you gave any of your columns a custom title in Query Builder, they revert back to their original names once imported to Dynamic Reporting. You can change them back on the Output tab.

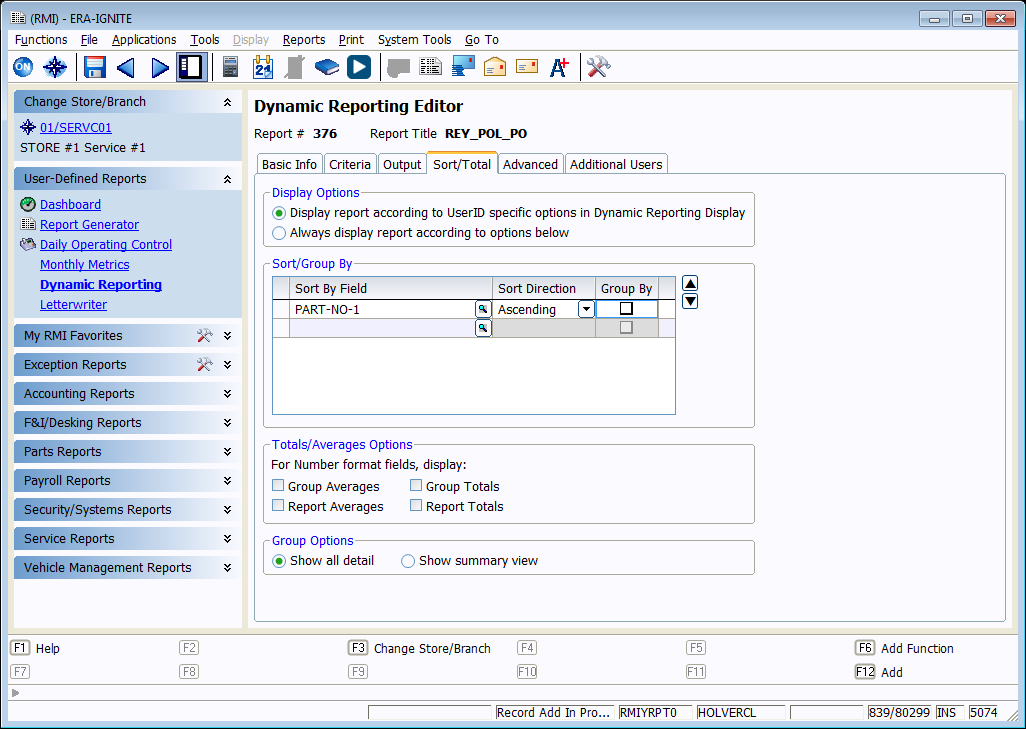
8. Review the Sort/Total tab to ensure that totals, averages, and break-ons are correct. All settings can be modified if you wish.
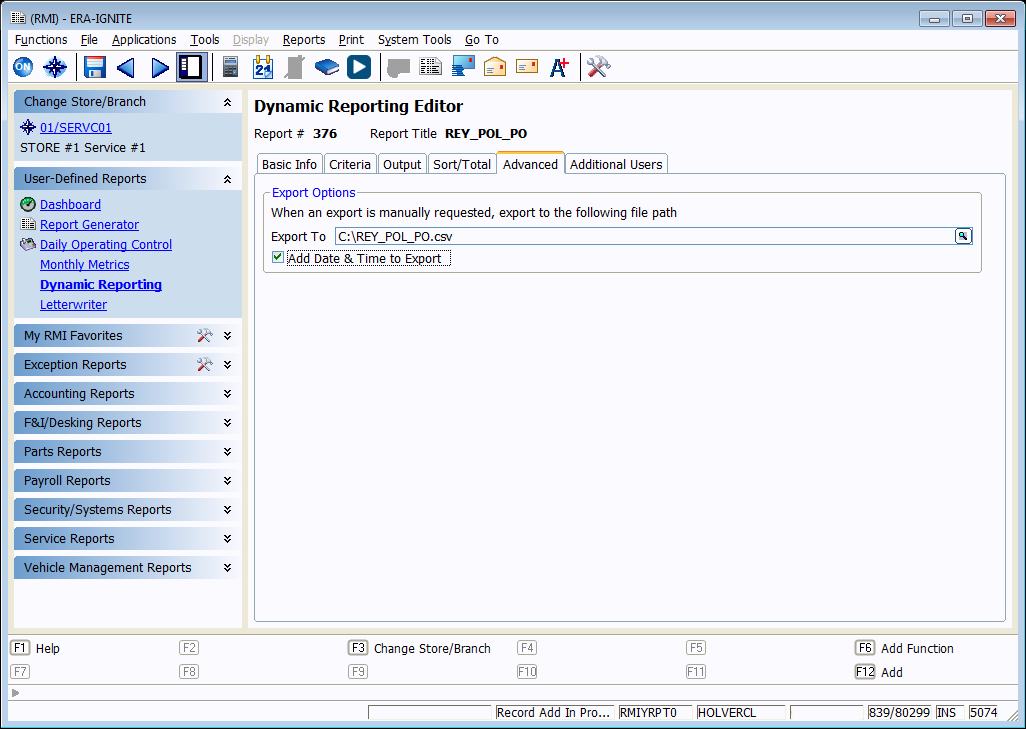
9. Set up your export options on the Advanced tab. When you run the report you have the ability to default the file it will be exported to if you choose to do so.
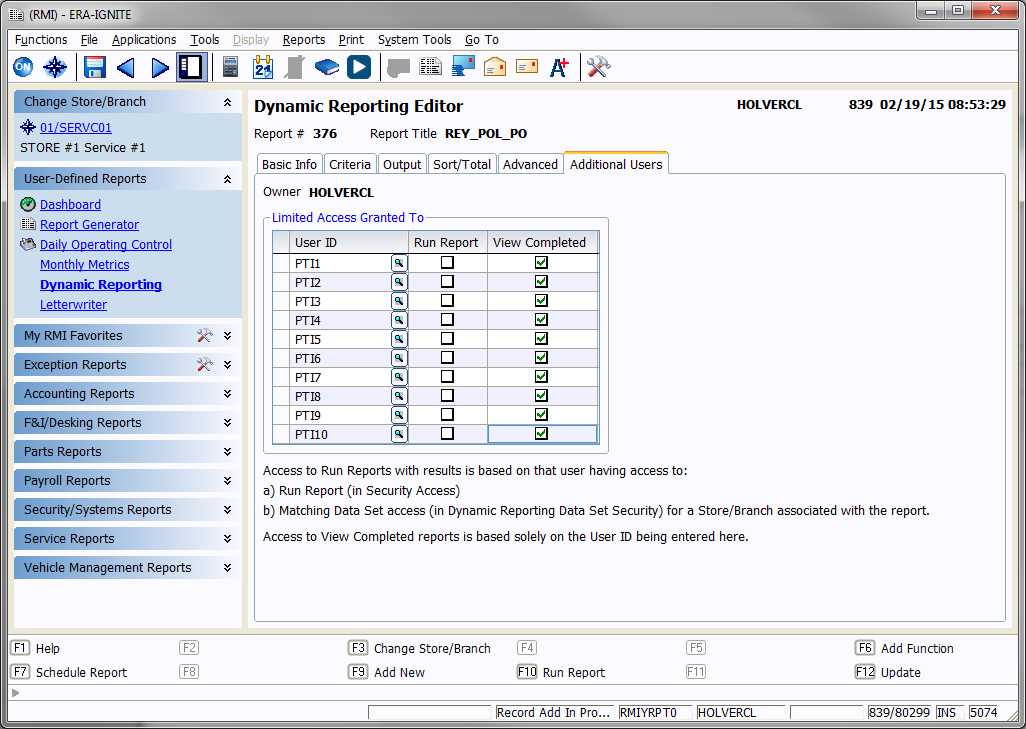
10. On the Additional Users tab, you can enter up to 10 additional users who may run the report or view the completed report. Note that in order to run the report, the user must have the security access to run reports, and have access to any data included in the report.
11. Finally, press (F12) Add to save your report.
To get the most out of Dynamic Reporting, check out our webinars and ‘Net Classes that can help you get familiar with Dynamic Reporting, and possibly introduce you to some helpful reports. For more information about ERA® software training, head to our website.
Share this Article
- Facebook
- Twitter
- LinkedIn
- Email


Software Education, Reynolds and Reynolds

Jennifer McReynolds has worked in Software Education over 15 years. In addition to overseeing the training of her instructors, Jennifer reviews and updates course materials to match recent software changes.
Related Articles:

Track Your Contracts in Transit With the Heat Sheet
One of the most important metrics you monitor in F&I is your contracts in transit. With ERA-IGNITE F&I Heat Sheet, tracking your funding is simplified.

Mobile Time Clock: Getting Started with Geofencing
Simplify the time punch process and establish boundaries using geofences with Mobile Time Clock.

Configuring Posting Screens in ERA-IGNITE Accounting
If most of your day is spent posting to the journal, try starting in posting mode instead of starting in search mode.

Tips and Tricks for Desking
Navigate the Desking application easier with these tricks.